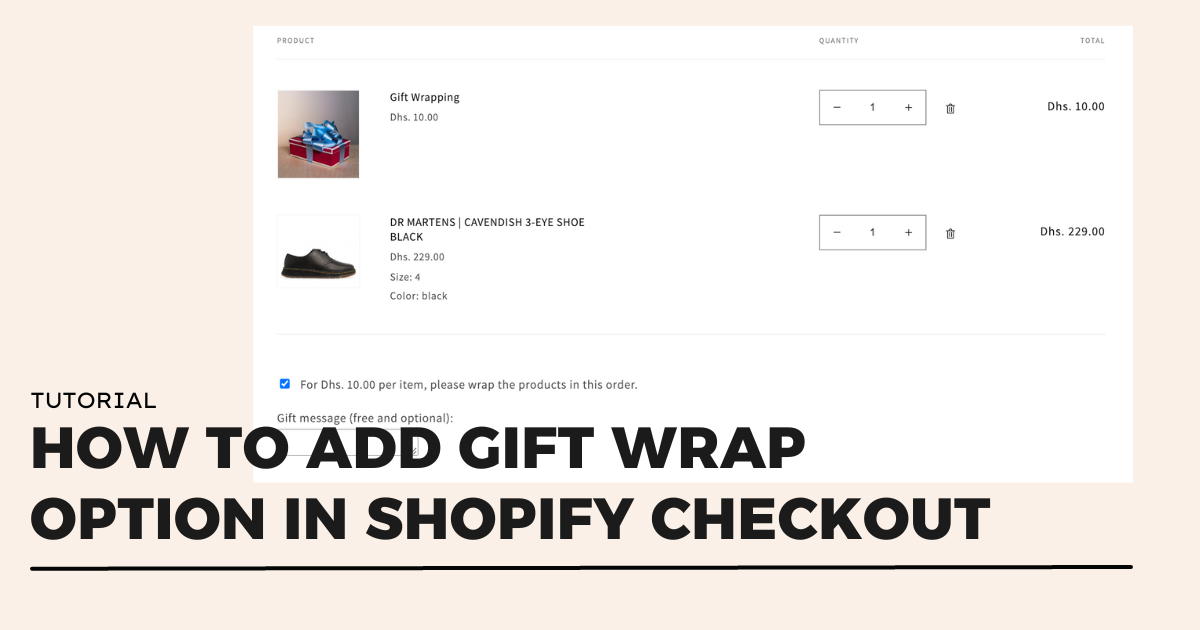
Note: The gift wrap option will only be available on the cart page (located at your-store.com/cart).
If you are using a cart drawer or pop-up, you will need to switch to a cart page style in the theme editor.
To view the gift wrap option in the theme preview, add a product to the cart and then navigate to the Cart page tab in the theme editor to access your cart settings.
Create Gift Wrap Product
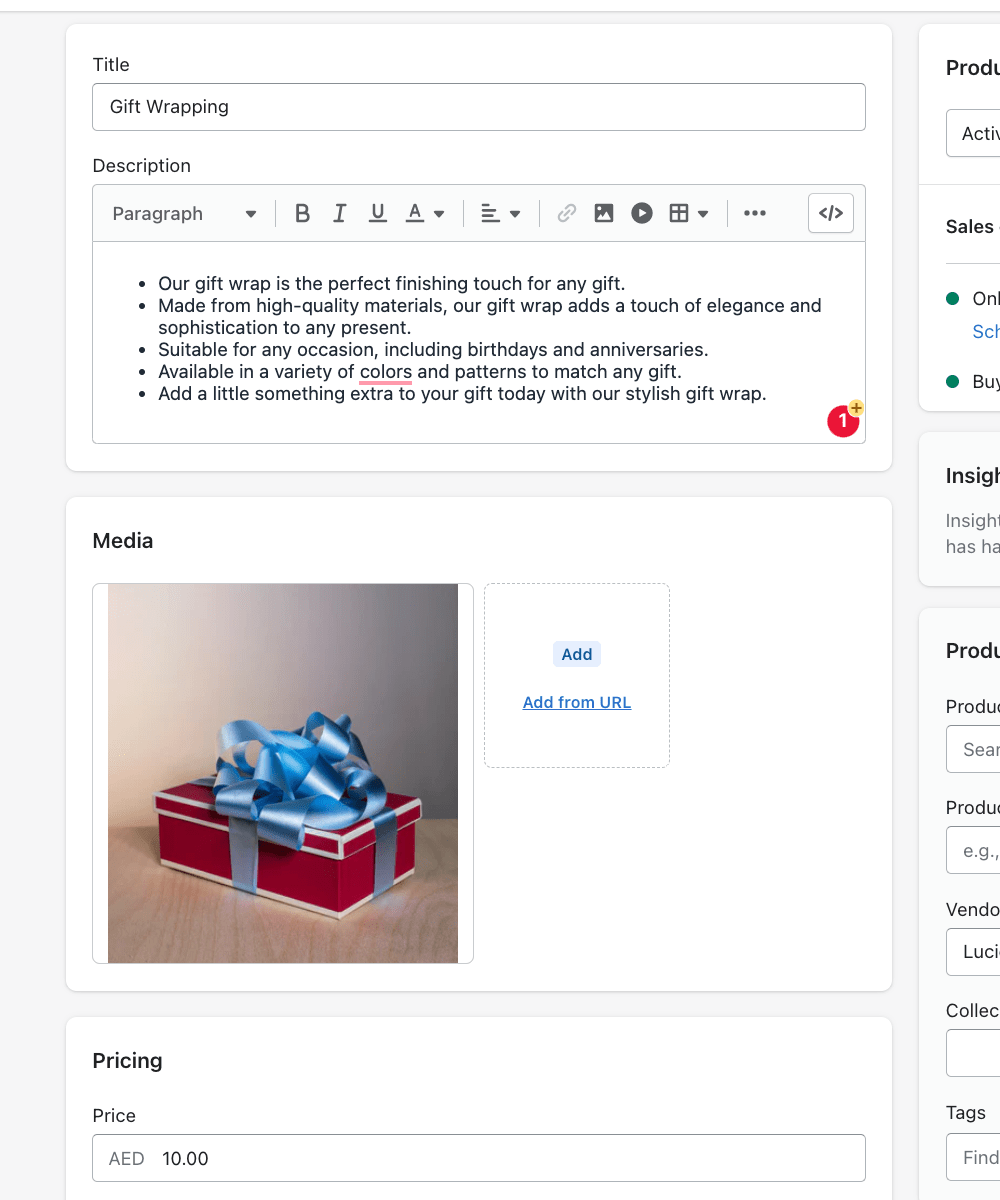
- Create a new product and name it 'Gift Wrap' (or choose a different name that works for you).
- Add a price for the gift wrap. If you do not want to charge for gift wrapping, you can set the price to 0.
- Write a description for the gift wrap, including information about the materials used.
- Add an image of the gift wrap to give users an idea of what it looks like.
- Set the inventory for the gift wrap product:
- If you want to track the inventory for the gift wrap, check the "Track Quantity" box.
- If you do not want to track the inventory or if your store has multiple locations, uncheck the "Track Quantity" box.
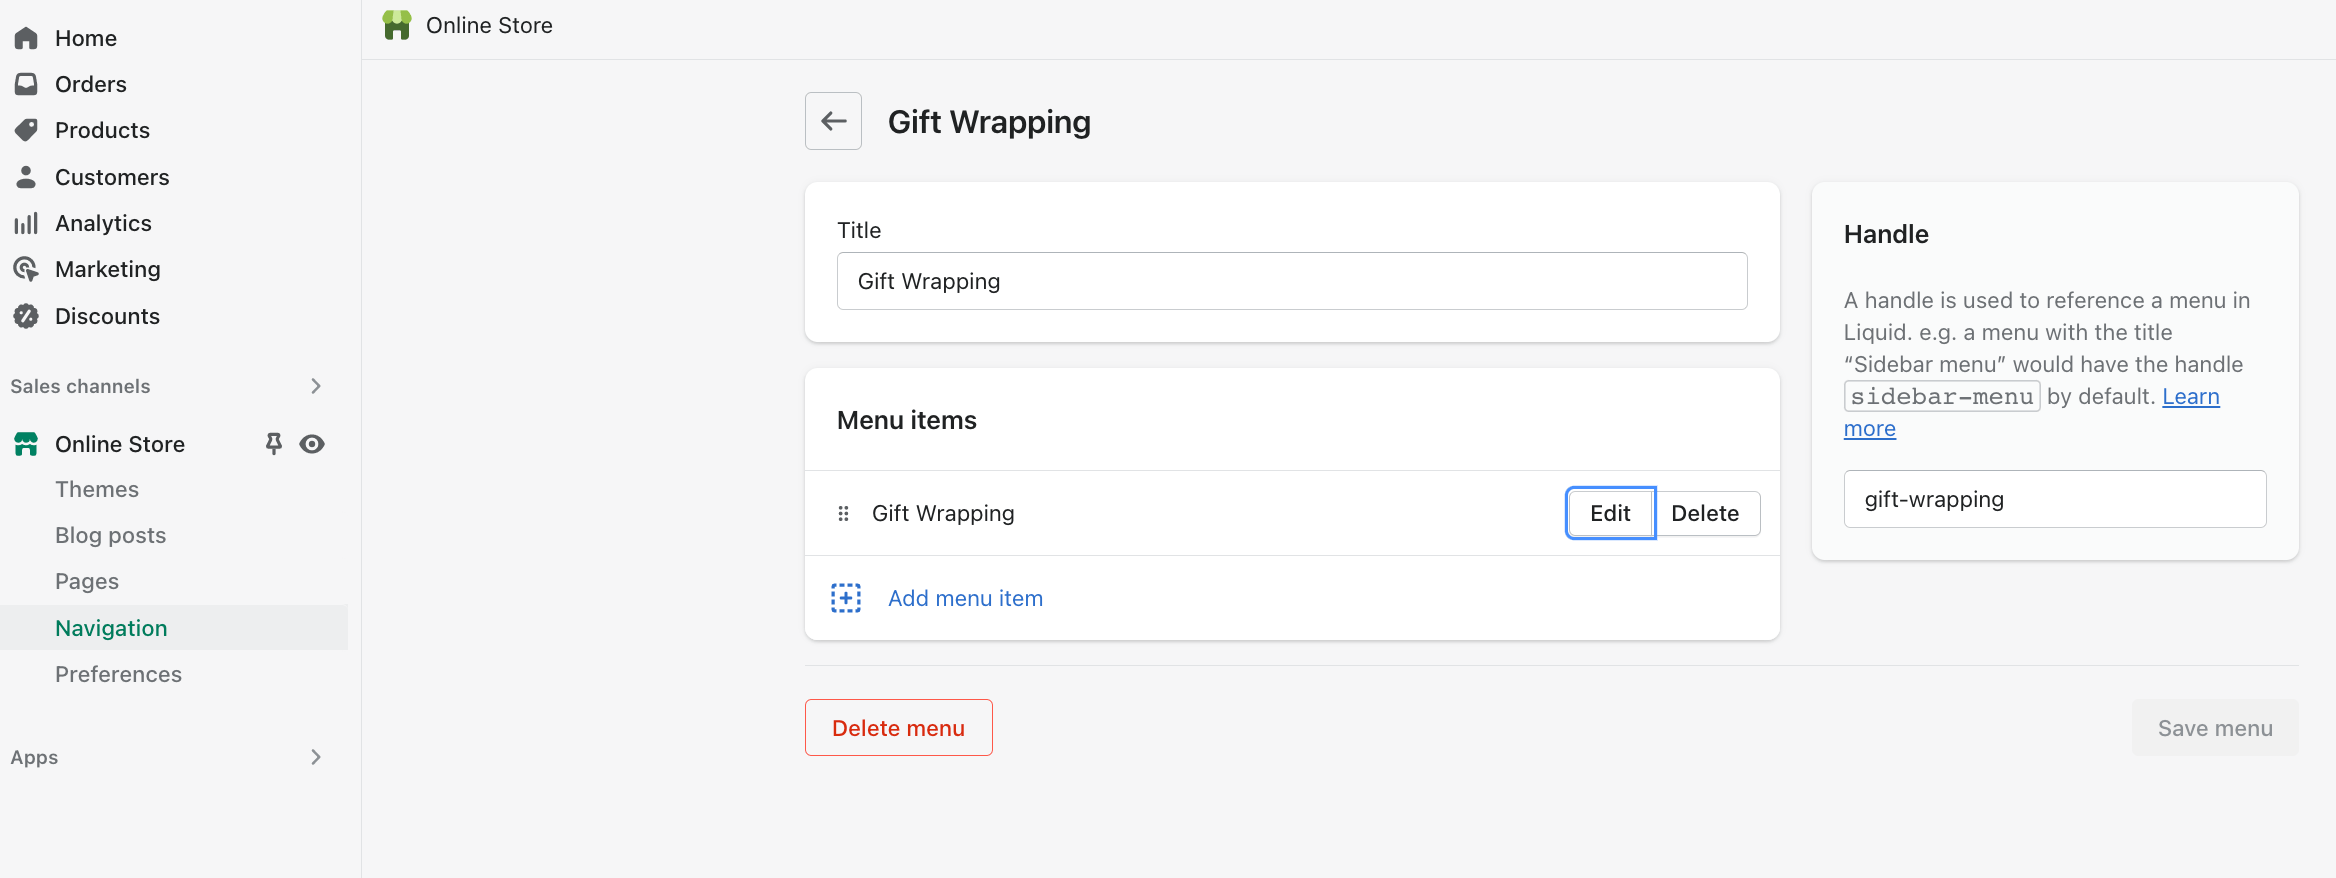
- Create a new menu in the navigation for your store.
- Name the menu "Gift Wrapping."
- Add the newly created "Gift Wrap" product to the menu.
Edit the code
- In the code editor for your Shopify store, create a new snippet and name it "gift-wrapping."
- If you want one gift per item, copy and paste the code from this file.
- If you want one gift for the whole cart, copy and paste the code from this file.
- Find the code for your cart. For example, if you are using the Dawn theme, the file name would be "main-cart-footer.liquid."
- Add the following code to the file:
{% render 'gift-wrapping' %} - Save the changes to the file.